


· By Daylon Gardner
How to Make Perfect Fried Cheese Curds: A Guide to Wisconsin’s Favorite Crispy, Gooey Snack
Key Takeaways
-
Fried cheese curds are a beloved Midwest tradition that you can easily make at home using three methods: deep-frying in oil, oven-baking, or air frying
-
Classic oil frying delivers that iconic state fair crunch with a molten, stretchy center, while oven-baking provides a lighter result, and air frying offers crisp results with less mess.
-
Fresh curds (ideally within a week of purchase) fry best; pat them dry before coating so your batter or breading clings properly.
-
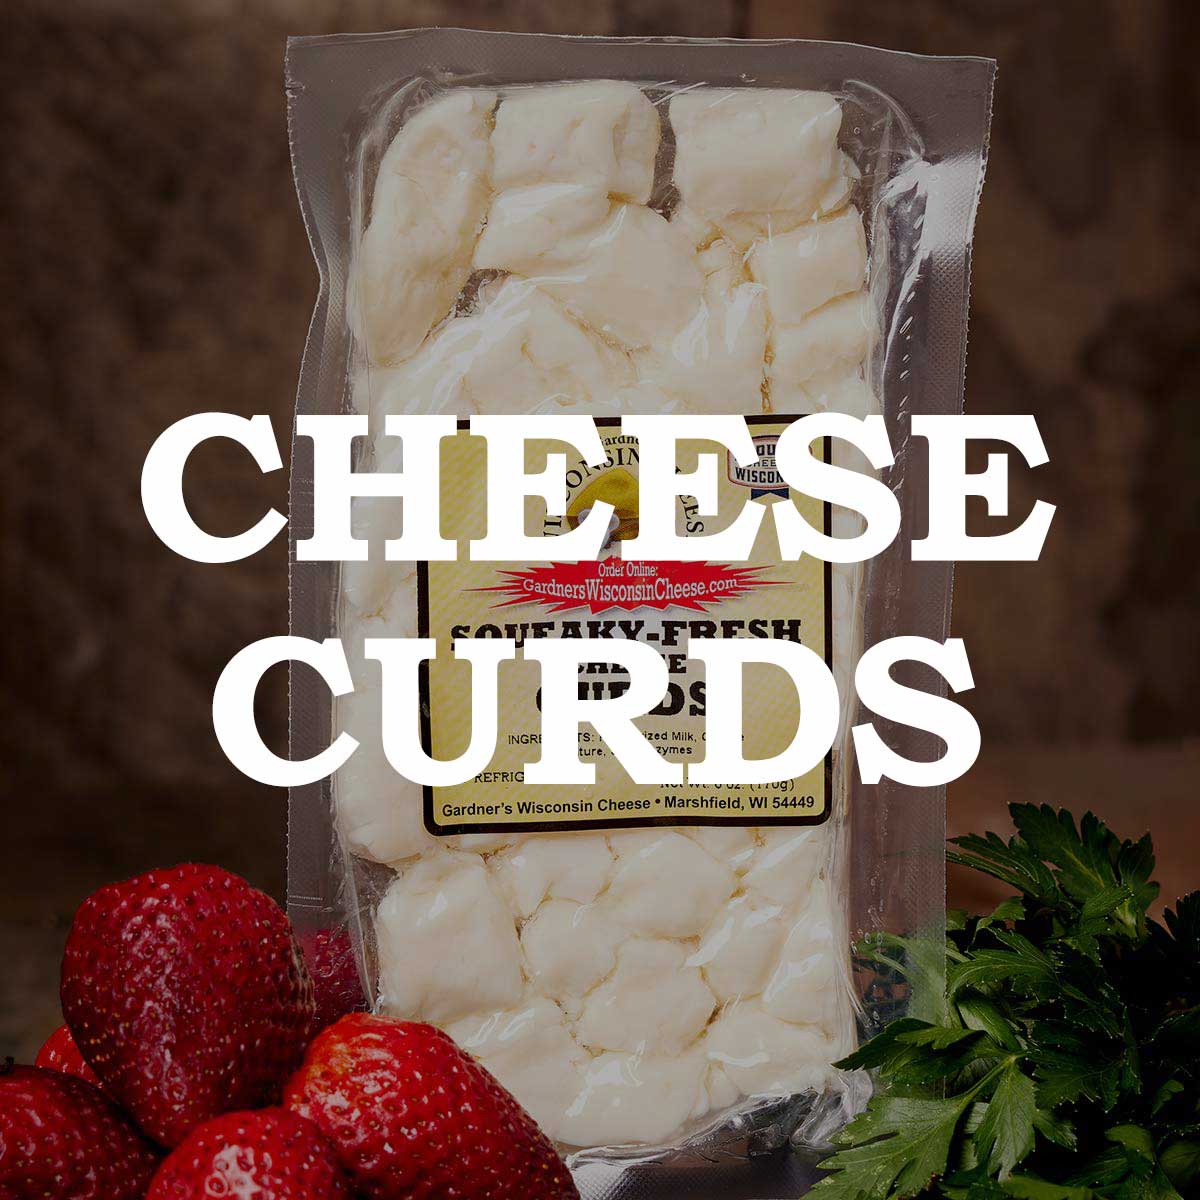
Gardner’s seasonal cheese curd flavors like garlic-herb, jalapeño, and buffalo wing curds are delicious fried, but our classic curds remain the crowd favorite year after year.
-
Serve cheese curds immediately after frying while the cheese is still gooey and the coating is crisp, pair with ranch dressing, marinara, or your favorite dipping sauce.
Introduction: From the Gardner’s Kitchen
Here at Gardner’s, we like to think of frying cheese curds the same way we’d think about coaxing the best out of a summer garden: it takes good ingredients, a little patience, and the right amount of heat. There’s something almost magical about watching a simple, squeaky curd transform into a golden, crispy shell hiding a molten, stretchy center. That’s the beauty of Wisconsin fried cheese curds, humble beginnings that lead to spectacular results.
Cheese curds have deep roots in the Upper Midwest, particularly Wisconsin and Minnesota, where they’ve been a staple at county fairs and Friday fish fries for decades. They made their official entrance into Midwestern food culture at the Minnesota State Fair in 1975, and they’ve been a beloved delicious snack ever since. At Gardner’s, we treat our curds like a seasonal harvest, rotating flavors throughout the year while always keeping our classic original on hand, because that’s what folks ask for most when it’s time to fry.
In this guide, we’ll walk you through how to fry cheese curds three different ways: the classic deep-fried method, oven-baked for lighter snacking, and air fryer for those who want crisp without the fuss. Whether you’re a first-timer or a seasoned curd enthusiast, you’ll find a method that suits your kitchen and your taste buds.

What Exactly Are Cheese Curds?
Think of cheese curds as cheese in its youngest, freshest form. During the cheese making process, milk is warmed and combined with cheese culture and rennet, which causes it to separate into curds and whey. Those fresh curds; before they’re pressed, aged, or shaped into blocks, are what we’re talking about here. They’re bite-sized, irregularly shaped little nuggets with a mild, milky flavor and that signature “squeak” against your teeth.
That squeak is the hallmark of truly fresh curds, usually within 24 to 48 hours of production. It happens because of the cheese’s unique protein structure and moisture content creating friction when you bite down. But here’s the beautiful thing: when you fry those squeaky cheese curds, that springy texture transforms into pure gooey goodness. The squeak melts away and becomes stretchy, creamy, and absolutely irresistible.
At Gardner’s, we use young white cheddar cheese curds as our baseline, clean-tasting and perfect for frying. Our seasonal flavorings get mixed in before the curds reach your kitchen, so whether you’re working with our original or a jalapeño batch, the irregular shapes are part of their charm. They’re not perfect little cubes, and that’s exactly how we like them.
Choosing and Preparing Curds for Frying
For the best results, start with fresh cheese curds, ideally same-day or next-day from the creamery. That said, curds stored properly in the refrigerator will still fry beautifully for about a week after purchase. Keep them in a sealed container to prevent them from drying out or absorbing other flavors from your fridge.
Before you start coating and frying, bring your curds to cool room temperature for about 15 to 20 minutes. This helps them cook more evenly, with the center warming through by the time the outside turns golden brown. If your curds are on the larger side (bigger than about 1.5 inches), consider cutting them in half so they cook consistently across all three methods.
Here’s a tip that makes a real difference: pat your curds completely dry with paper towels before dipping them in batter or breading. Moisture on the surface prevents coatings from sticking properly, and you’ll end up with bare spots or batter sliding off into your oil. This step is especially important for oven and air fryer methods, where you’re working with less forgiving coating techniques.
One fun approach? Divide a single batch of curds into three portions and cook them in different ways for a side-by-side tasting. It’s like a “tasting garden” of textures and you’ll quickly discover which method you like most.

Frying Cheese Curds in Oil (Classic Fair-Style)
This is the traditional method, the one that’ll transport you straight to a Wisconsin state fair with one bite. Deep fried cheese curds cooked in hot oil deliver that unmistakable combination of shatteringly crisp exterior and molten, stretchy cheese inside. If you want the authentic experience, this is where you start.
Setting Up Your Frying Station
Fill a dutch oven, deep fryer, or heavy-bottomed pot with about 3 inches of neutral oil; peanut oil, canola oil, or vegetable oil all work beautifully. You want oils with high smoke points that won’t impart their own flavors. Heat your oil to 350–375°F, using a thermometer to monitor the oil temperature throughout. Consistent heat is the secret to perfectly fried curds that don’t leak or turn greasy.
Making the Batter
A good fried cheese curds recipe starts with a simple beer batter. Combine flour (about 1 cup of all purpose flour), a half teaspoon of baking powder, a pinch of salt, cayenne pepper if you like heat, and garlic powder or garlic salt for savory depth. Whisk in about half a cup of butter milk and half a cup of beer until you achieve a thin batter consistency, think thin pancake batter that drips easily from a spoon. The beer’s carbonation creates lightness, while the buttermilk adds tang. If the batter is too thick, the batter sticks to the curds in clumps; too thin and it won’t coat properly.
The Frying Process
Work in small batches of 5–6 curds at a time. Dip cheese curds into the batter, shake off excess batter, and carefully lower them into the hot oil using a slotted spoon. Don’t crowd the pot as overcrowding drops the oil temperature and leads to soggy, cheese leaked disasters. Fry for roughly 45–60 seconds until they’re light golden brown and floating. Use your slotted spoon to transfer them to a paper towel lined plate or wire rack. Season with a sprinkle of salt immediately while they’re still glistening.
Let the oil recover between batches, checking that it’s back up to temperature before adding more battered curds. When we host tastings here at Gardner’s, this oil-fried method is always how we deep fry curds using our classic curds, it shows off that creamy center better than any other approach.
Why People Love Oil-Fried Curds
The signature appeal is that contrast: a thin, shattering crust giving way to molten, stretchy cheddar cheese that pulls in long, beautiful strands. It’s the closest you’ll get to that Wisconsin county fair experience without actually being there. People who love fried cheese curds almost always trace their devotion back to their first oil-fried version.
This method works especially well with richer seasonal flavors. Our limited time chili cheese curds, for instance, get even more complex when deep fried. The oil itself adds a subtle depth of flavor, similar to how cooking garden vegetables in a well-seasoned cast-iron pan brings out flavors you didn’t know were hiding.
Oil-fried curds are ideal for game days, backyard gatherings, and any occasion where you’re willing to put in a bit of extra effort for maximum “wow” factor. There’s nothing quite like the aroma and sound of curds sizzling in hot oil, it draws people to the kitchen like a beacon.

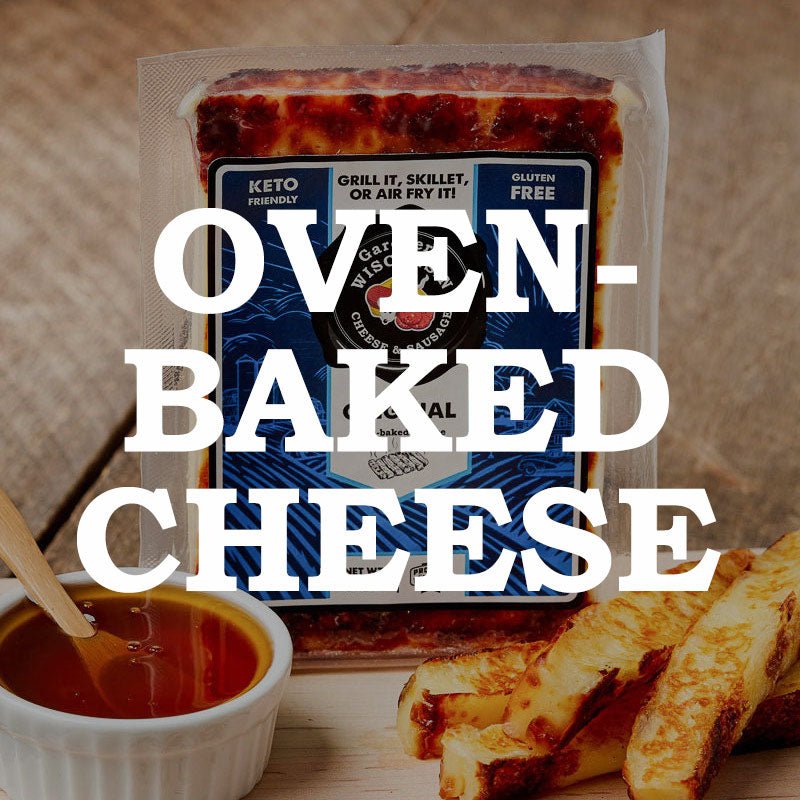
Oven-Baked “Fried” Cheese Curds
For those who prefer a lighter touch, or don’t want to manage a pot of hot oil, oven-baked fried curds offer a satisfying alternative. You won’t get quite the same explosive crunch as deep frying, but you’ll still end up with a crispy coating and tender, melty interior.
Preparing for the Oven
Preheat your oven to 400°F and line a baking sheet with parchment paper. Set up a simple breading station: one bowl with beaten egg or buttermilk, another with seasoned all purpose flour or fine bread crumbs mixed with your preferred seasonings: garlic powder, paprika, salt, and pepper work nicely. You can also use remaining flour from another batch if you’re cooking multiple methods.
Place cheese curds first into the wet mixture, then toss cheese curds in the breading mixture until fully coated. Arrange them on your prepared baking sheet with space between each curd so air can circulate. Here’s the crucial step: lightly spray or brush the coated curds with extra virgin olive oil or canola oil so they crisp up rather than drying out.
Baking and Results
Bake for 8–12 minutes, checking around the 8-minute mark. You want them golden and crisp on the outside with cheese that’s soft and stretchy inside, not completely melted and pooling on the pan. The cook time varies depending on curd size and your oven’s temperament, so keep a close eye on your first batch.
The result is a gentler crust that’s less greasy than deep fried versions but still satisfying. Oven-baking pairs particularly well with Gardner’s brighter seasonal flavors like our garlic dill curd or jalapeno; those seasonings stay more distinct when they’re not competing with frying oil.
Why People Enjoy the Oven Method
Many home cooks appreciate being able to spread a full pan of curds, slide it into the oven, and then prepare other things. There’s no standing over a pot monitoring temperatures; the oven does the work while you handle everything else.
Oven-baked curds also feel lighter, which appeals to families serving them on weeknights rather than saving fried curds exclusively for parties. The seasonings on Gardner’s curds remain clean and distinct with this method, similar to how roasting herbs gently preserves their character better than charring them over high heat.
Cleanup is another major advantage; no deep fat fryer to clean, no large pot of oil to strain and store. For first-timers nervous about working with hot oil, the oven offers a welcoming entry point into homemade fried cheese.

Air Fryer Cheese Curds
The air fryer has become a beloved middle ground between deep frying and oven baking. You get more crisp than the oven can deliver, but without the volume of oil or the mess of traditional frying. It’s become one of the most popular ways our Gardner’s regulars cook curds at home.
Setting Up Your Air Fryer
Preheat your air fryer to 370–390°F. Lightly spray the basket with cooking spray or brush with a thin layer of olive oil to prevent sticking. Use a coating similar to the oven method, flour or breadcrumb-based rather than a wet beer batter. Wet batters tend to drip through the air fryer basket and burn on the heating element, creating smoke and mess.
Dip your dry curds in beaten egg or buttermilk, then roll them in seasoned remaining flour or bread crumbs. Shake off any excess and arrange them in a single layer in the basket. Don’t stack them or they won’t crisp evenly.
Cooking and Watching Closely
Air fry for about 5–8 minutes, shaking the basket once halfway through the cook time. Different air fryer models run hotter or cooler, so watch your first batch closely and adjust timing accordingly. You’re looking for a very crispy outside with soft, stretchy cheese inside, pull them out when they’re golden brown and the coating looks set.
The finished texture is remarkably satisfying: crunchier than oven-baked, with that same gooey interior you get from oil frying. The key is eating them right away while everything is still at peak temperature.
Why the Air Fryer Has Its Fans
People enjoy the air fryer’s speed and sense of control. There’s no large volume of hot oil to monitor, no thermometer to babysit, but you still get a satisfying crunch that rivals the traditional method.
The air fryer is also perfect for reheating leftover curds. Whether you made oil-fried, oven-baked, or picked up one of our take-home packs, a few minutes in the air fryer at 350–370°F restores crispness without making things soggy the way a microwave would.
This method works especially well with Gardner’s bolder seasonal curds, jalapeño, maple bacon, or buffalo wing flavored. The crisp shell holds in all that spicy, melty cheese beautifully. And for small households or late-night snacks, the air fryer shines: cook a handful of curds without heating up your whole kitchen. It’s like discovering a new garden tool that makes everything easier, once you try it, you’ll wonder how you went without it.

Original vs. Seasonal Gardner’s Curds When Fried
At Gardner’s, we offer our original cheddar curds year-round, plus rotating seasonal varieties that follow the calendar. We have ones like garlic & dill available year round, jalapeño through the hot summer months, chili cheese flavored curds during the start of the year, and more flavors that release as the year goes on..
Frying brings out different characters in each variety. Our original curds become pure, buttery, and mild, a clean canvas that lets the crispy coating and any dipping sauce shine. Seasoned curds, on the other hand, show off their added herbs, spices, or peppers more intensely once that heat transforms the cheese into stretchy goodness.
Here’s what we’ve learned from years of tastings and fairs: year after year, the original curds remain the most requested for deep frying. Their clean Wisconsin cheese flavor pairs well with virtually any favorite dipping sauce; ranch dressing, marinara, honey-mustard, you name it. The simplicity lets the quality of the cheese speak for itself.

Serving, Dips, and Enjoying Fried Curds
Serve cheese curds immediately after they leave the oil, oven, or air fryer. Fried curds are at their absolute best within minutes of cooking, when the cheese is still molten and the crust has that perfect just-set crispness. Wait too long and the cheese melts further while the coating loses its crunch, still tasty, but not the same experience.
Dipping Sauce Pairings
A great dipping sauce elevates good curds to memorable ones. Try dipping fried curds into any of our pairings:
-
Raspberry Honey Mustard for that sweet plus salty combination that feels like a tiny therapy session for your tastebuds.
-
Hot Honey Drizzle when you want sweet heat and a little drama.
-
Wild Berry Drizzle if you want to pretend you are pairing artisanal cheese with fruit in a tasting room somewhere.
-
Roasted Red Pepper and Garlic Drizzle for smoky, savory magic that basically turns your curds into bar food royalty.
Simple Sides
Keep things fresh with simple accompaniments: carrot sticks, celery, pickled beans, or sliced radishes. These garden-table additions cut through the richness of all the cheese and keep the spread feeling balanced rather than heavy.
Occasions for Fried Curds
-
Friday night fish fry add-on (a Wisconsin tradition!)
-
Fall bonfires and tailgates
-
National Cheese Curd Day (mid-October)
-
Casual weekend snacking after yard work
-
Game day appetizer cuisine spreads
For your next gathering, consider serving a flight: one plate of oil-fried original curds, one with oven-baked herb curds, and one with air-fried jalapeño curds. Let friends compare and debate their favorites, it’s a guaranteed conversation starter.
